In this demo I will show you how to set up a basic Laravel app. I will also show you how you can use some of the key features of Laravel to display and query data. For the development setup and components needed to install and run laravel apps please see this gist created by me. In this post I will focus on the Laravel Basic App Setup and using its basic features.
Create a new project
To create a new projects open your terminal and run the following in the directory where you would like the app to be stored. In our case we add it to our Valet (easy as pie local MacOS server) folder so we can run the Laravel app using our Homebrew installed nginx server, mariadb database server and PHP 7.1
laravel new ch9
You will see something like this:
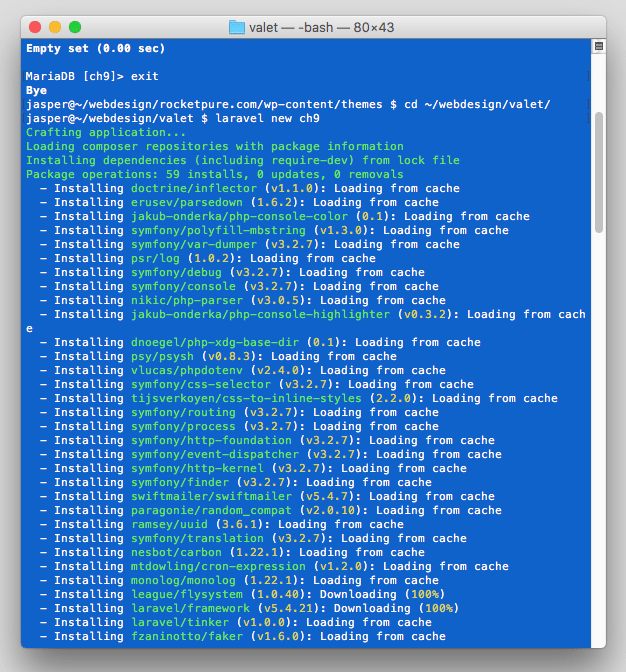
Many packages will be installed and many will be suggested as well. We will stick to the basics. So no need to install more packages for now.
Create the database
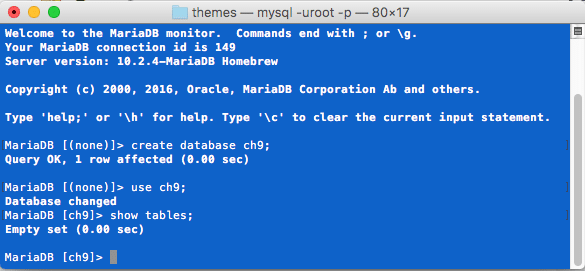
The database you can create using an app like Sequel Pro, but we will do it from the terminal or command line using the following commands:
mysql -uroot -p
create database ch9;
exit
Here a screenshot of setting up the database:
Adjusting the .env file
You will now need to edit .env to reflect database, user and password as you will be using:
cd ch9
sublime .
You can use the following details now:
DB_CONNECTION=mysql
DB_HOST=127.0.0.1
DB_PORT=3306
DB_DATABASE=ch9
DB_USERNAME=root
DB_PASSWORD=
That should do the trick to connect to the local MariaDB database server as root and with nothing for the password.
Artisan & Migrating tables
To generate the initially setup tables by Laravel which is the users table and password reset table we can now create them using the following Artisan command:
php artisan migrate
After you have run that command you will see something like this in the terminal:
Migration table created successfully.
Migrating: 2014_10_12_000000_create_users_table
Migrated: 2014_10_12_000000_create_users_table
Migrating: 2014_10_12_100000_create_password_resets_table
Migrated: 2014_10_12_100000_create_password_resets_table
This will mean the migration went fine. And when I open the database with Sequel Pro I will see that these three tables have been added:

Basic Routing
For basic routing you need to go to routes/web.php . The basic route is setup to show a Laravel splash page with some basic links.
 #method, uri and Closure
 # http://php.net/manual/en/class.closure.php
 Route::get('amwaj', function () {
 return view ('amwaj', [
 'name' => 'CH9'
 ]);
});
Blade Templating Engine
To display some basic input data as added to the route above you need to edit the welcome.blade.view file under views. There you can use Blade templating to display this variable’s data. So create a new amwaj.blade.php under resources/views and add
{{ $name }}
This will echo out the variable using the blade moustache tags.
Create a new Table
As we of course want to retrieve at least data from the database the previous example is not that cool. So let’s add some random data to a table and retrieve this using the Laravel Query Builder. So first things first. Let’s create the table migration:
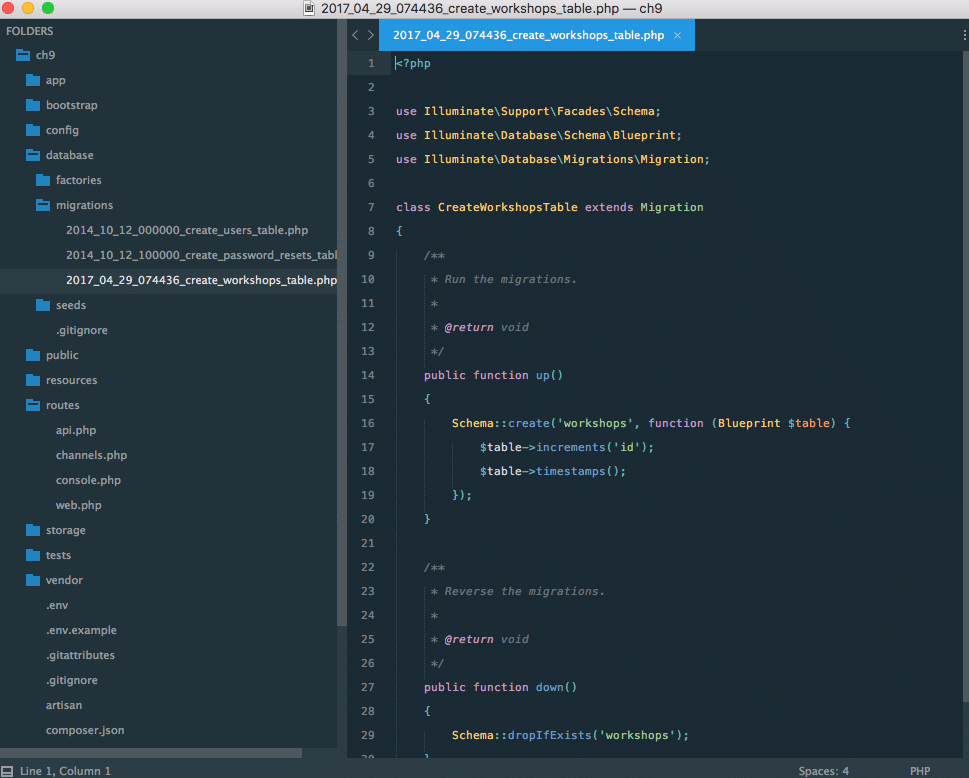
php artisan make:migration create_workshops_table --create workshops
The flag:
-- create workshops
will let Laravel know we are creating a table migration and it will add schema data as well.
Then you will see the new migration added under database/migrations:
Adding Table Rows
We will edit it and add one more row to it to add a title to the table workshops. So the up function will show this now:
public function up()
 {
 Schema::create('workshops', function (Blueprint $table) {
 $table->increments('id');
 $table->string('title');
 $table->timestamps();
 });
 }
We could also add a body row for the workshop content of course. Then we just need to add one more line of code:
$table->text('body');
Then let’s migrate to add the table to the database:
php artisan migrate
et voilà:
jasper@~/webdesign/valet/ch9 $ php artisan migrate
Migrating: 2017_04_29_074436_create_workshops_table
Migrated: 2017_04_29_074436_create_workshops_table
Here the screenshot from Sequel Pro:
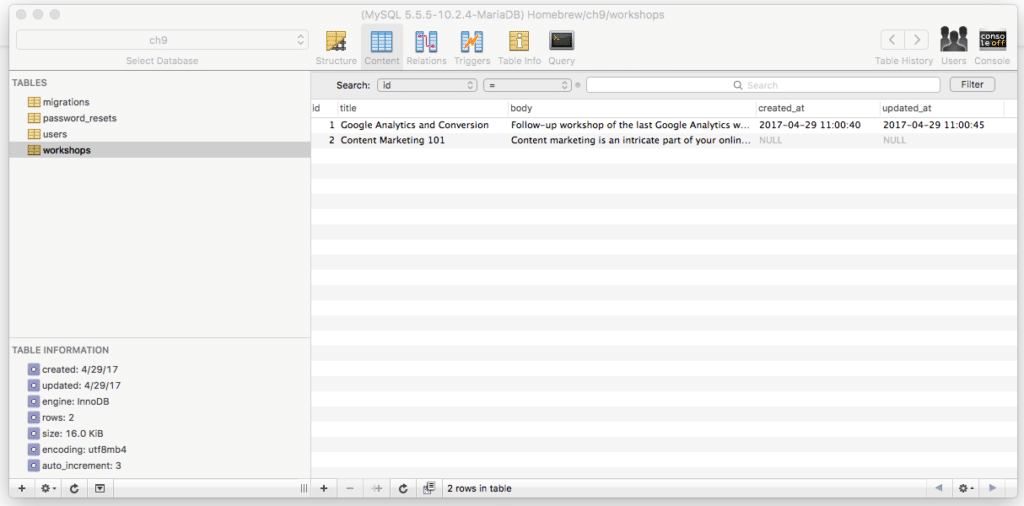
Dummy data
Now let’s add some dummy data to the table workshops in Sequel Pro
title text
Google Analytics and Conversion
body text
Follow-up workshop of the last Google Analytics workshop. This time around focussed on conversion tracking. Table of Contents: - Acquisition - Analytics & Campaigns- ..
for creation and update data just add
NOW()
Let’s add one more row:
title two
Content Marketing 101
body two
Content marketing is an intricate part of your online marketing strategy or should be. It is an important part of online branding, customer trust building. It is a big...
Query Builder
To get data from the database we have to set up a query in our route and we also have to set up a blade template to display this retrieved data. The query builder has a beautiful fluent syntax and secures the connection to the database and the retrieval or posting of data.
The Laravel query builder uses PDO parameter binding to protect your application against SQL injection attacks. There is no need to clean strings being passed as bindings.
Here is the route we could use:
Route::get('wsdb', function () {
$workshops = DB::table('workshops')->latest()->get();
return view('wsdb', compact('workshops'));
});
And then in wsdb.blade.php we can add this code for display:
<!DOCTYPE html>
<html>
<head>
 <title>Laravel</title>
</head>
<body>
 <ul>
 @foreach ($workshops as $workshop)
 <li>{{$workshop->body}}</li>
 @endforeach
 </ul>
</body>
</html>
As you can see we use Blade’s syntax here too for the foreach loop. This as well as the {{}} to echo out data. When you now load ch9/wsdb, you have your data!
Routing Wildcard
If we now would simply want to load objects from the database table and display them on a workshop page, one workshop per page we can use the Query Builder’s wildcard – {workshop} in this case – so we can display any workshop we want in the browser based on $id for example:
// http://ch9.dev/workshops/1
Route::get('/workshops/{workshop}', function ($id) {
$workshop = DB::table('workshops')->find($id);
//dd($id); // Laravel helper function die and dump
//dd($workshop);
return view('workshops.show', compact('workshop'));
});
workshops.show is the Blade way to show the path to the view for workshops show.blade.php. It should be added under views/workshops:
<!DOCTYPE html>
<html>
<head>
 <title></title>
</head>
<body>
<p>{{ $workshop->body }}</p>
</body>
</html>
Eloquent Active Records
Now let’s create a model for the representation of our table workshops. This can be done with Laravel’s active records system Eloquent
php artisan make:model workshop
you will see:
jasper@~/webdesign/valet/ch9 $ php artisan make:model workshop
Model created successfully.
and in your app folder you will see the new file workshop.php . It has the code:
<?php
namespace App;
use Illuminate\Database\Eloquent\Model;
class workshop extends Model
{
 //
}
Laravel Tinker
Now that we have a model we can use Tinker REPL – powered by PsySH – to see what we can do with this extension of the Eloquent model class in our own workshop class:
php artisan tinker
and then on the command line you can add:
App\Workshop::all();
which will show you all the records you have in the table:
jasper@~/webdesign/valet/ch9 $ php artisan tinker
Psy Shell v0.8.3 (PHP 7.1.4 — cli) by Justin Hileman
>>> App\Workshop::all();
=> Illuminate\Database\Eloquent\Collection {#670
 all: [
 App\workshop {#671
 id: 1,
 title: "Google Analytics and Conversion",
 body: "Follow-up workshop of the last Google Analytics workshop. This time around focussed on conversion tracking. Table of Contents: - Acquisition - Analytics & Campaigns- ..",
 created_at: "2017-04-29 11:00:40",
 updated_at: "2017-04-29 11:00:45",
 },
 App\workshop {#672
 id: 2,
 title: "Content Marketing 101",
 body: "Content marketing is an intricate part of your online marketing strategy or should be. It is an important part of online branding, customer trust building. It is a big...",
 created_at: null,
 updated_at: null,
 },
 ],
 }
>>>
Tinker allows us to try out all these newly available helper methods. As you saw we used the following method all() we now have access to:
App\Workshop::all();
NB See Scope Resolution Operator :: details at http://php.net/manual/en/language.oop5.paamayim-nekudotayim.php
Inside the namespace App we access the Workshop Model and query all that the table has. Workshop is a model and extension of the Eloquent model and by using this new instance we can use all the methods under Eloquent. There are for example other methods under the collections class like pluck() and first() we can now use. See https://laravel.com/docs/5.4/collections . One more example would be
App\Workshop::where('id', '>', 2)->get()
where we use the method where() .
Eloquent Benefits
So now that we have an Eloquent model we can replace query builder queries with an Eloquent object. This allows us to grab the same data more easily and to extend this model with additional functionality / methods. It also allows us to query data using additional helper functions.
Think of each Eloquent model as a powerful query builder allowing you to fluently query the database table associated with the model. For example:
<?php use App\Flight;
$flights = App\Flight::all();
foreach ($flights as $flight) {
echo $flight->name;
}
Route using Eloquent
So to query the index page with all workshops we can now use Eloquent and this code:
// Eloquent Active Records
Route::get('/workshops', function () {
 $workshops = App\Workshop::all();
 return view('workshops.index', compact('workshops'));
});
Earlier we explained what it does and the additional benefit of extension so we won’t get into this again.
Do not forget to add a new view under resources/views/workshops/index.blade.php with:
<!DOCTYPE html>
<html>
<head>
 <title>Laravel</title>
</head>
<body>
 <ul>
 @foreach ($workshops as $workshop)
 <li>{{$workshop->body}}</li>
 @endforeach
 </ul>
</body>
</html>
for a basic display like we had for wsdb.blade.php . Otherwise you will run into errors!
Complete Code
Full demo code can be found at this Github repo I created for sharing the final result: https://github.com/jasperf/laravel-basic-demo-app .
If you get an error that a migration cannot be found use composer dump-autoload